You may have recently upgraded to a DSLR or Bridge camera, you are getting serious about your photography and want to know how to control everything yourself. The camera on automatic no longer satisfies your needs. Here’s how to take control.
There are three simple things to understand to take total control of your camera and produce all your exposures manually. The Aperture or size of hole that lets light in, the shutter speed or time that the hole is open for and the film speed or chip sensitivity. Between these three we end up with an exposure.
Each one of the three has consequences in it’s adjustment so lets look at all three individually and understand what happens when you adjust them.
We’ll start with the simplest the shutter speed. Quite simply the fastest shutter speed will freeze movement the best and the slower the shutter speed the more chance you have of getting movement blur or camera shake.
Shutter speeds are normally shown on old camera bodies with the following numbers 500th, 250th,125th,60th,30th,15th,8th,and so on down through a quarter and a half a second. The 500th of a second exposure will freeze fast action like sports or kids jumping about the best. Take the shutter speed below 60th and you could get not only subject movement but also camera shake. This is why you often see professionals using tripods – to cut out camera shake.
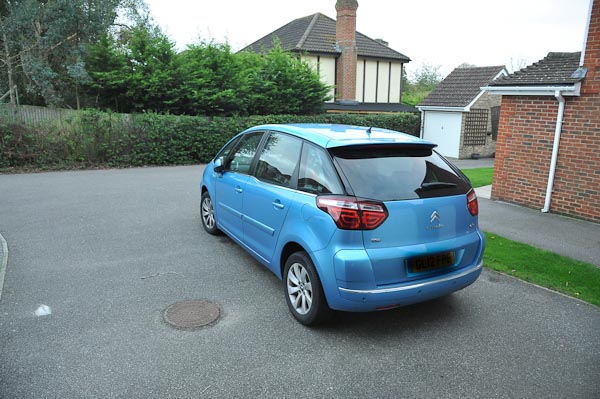
Of course with today’s digital cameras the above shutter settings have the ability to set an almost infinite number of settings in between each setting listed above so between 125trh and 250th you might have 160th and 200th. The first scale where the shutter speed doubles every time is called a stop adjustment each doubling is the equivalent of one stop of exposure so the second example is actually one third of a stop adjustment to the exposure, which is very small and hardly visible to the untrained eye. A one stop exposure difference is shown below.
Depending on what lens you have on you might need a faster shutter speed. A standard lens of 50mm on a 35mm camera needs about a 60th of a second as the slowest shutter speed to be sure of not getting camera shake. If you have a telephone of four times that, a 200mm lens then it is suggested 200th of a second is the best slowest shutter speed to use to stop camera shake. And so it goes on, the longer the lens the faster the shutter speed recommended. Having said that, many modern cameras have image stabilisation electronics built into them and they mean you can hand hold a longer lens at a slower shutter speed, this is also measured in stops and often mean you can hold a long lens at two or three stops slower than is normally recommended.
So we vary our shutter speed relative to the subject we are shooting, a wide angle scenic shot has little movement in it so a slower shutter speed could be used, a racing car might be moving very fast and to freeze the action we could need a shutter speed in excess of 100oth of a second.
But if we are changing the shutter to be less and less time we need to adjust something else to make sure the same amount of light gets in to get the correct exposure. And so we come to the aperture! Which is the size of the hole that lets the light in.
It’s quite logical that if the shutter is open half the time we need a hole twice as big to get the same amount of light in. This is the same for any situation. The hole size is measured in F-stops and each stop of the F-stops, just like the shutter doubles the exposure. F-stops are normally found on a camera marked up at F1.2, F1.8. F2. F2.8, F4, F5.6, F8, F11, F16, F22, F32. As with shutter speeds today’s digital camera will offer you third of a stop increments between these as well. But the important ones to remember are the full stops listed above.

So apart from balancing the correct exposure related to the shutter speed what consequences does the F-stop have? Simply put the bigger the hole the less time it takes to let the same amount of light in and therefore the less time that light has to focus on the chip so a big aperture gives you a shallow depth of field of focus and a small hole gives you a big depth of field.
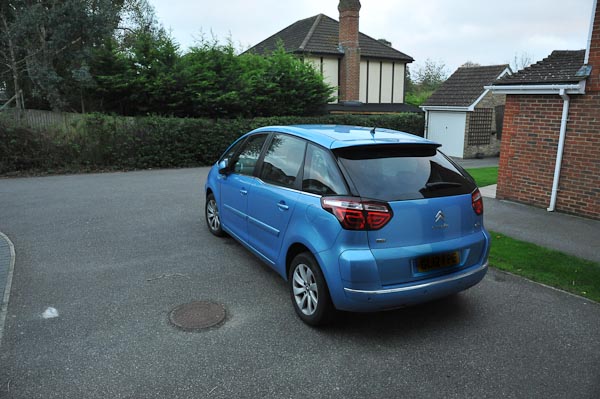
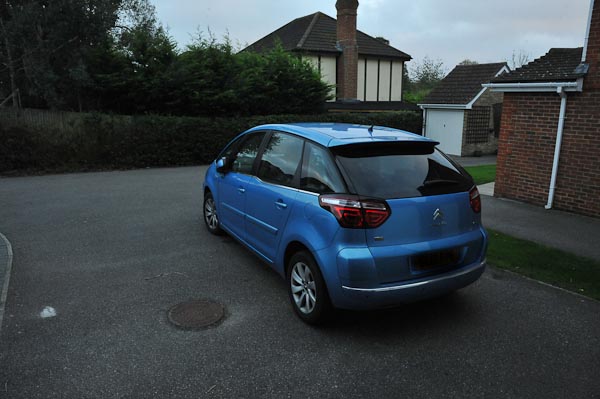
Below is an example of a shallow depth of field and a large depth of field set on my camera.

What confuses most people with apertures is that the largest hole is the smallest number. But it’s simple if you just think of how much you want to get in focus, if you want to get a lot in focus use a large number like F22 and if you only want a little in focus to make a subject stand out from a background use a small F number.
The last element of the exposure is the simplest of the lot – it’s the sensitivity of the chip. Measured in ISO ratings the rating is related to old film speeds so you often see ISO ratings of 100 iso, 200 iso, 400i so, 800 iso, 1600i so, 3200 iso and 6400 iso. Again you’ll notice each ISO rating doubles as it’s sensitivity doubles. So yet again the scale is in stops. Now we can see that one whole F-stop is the equivalent of one doubling or halfing of shutter speed or one doubling or halfing of sensitivity of the chip. Once this is understood the camera is your tool to use as you wish it is the most basic secret of the understanding of photography and correct exposure.
What are the trade off’s of going up the sensitivity ratings of the chip, simply that the faster you try and run the chip the worse the quality of the image.
Using the information above lets look at a few real life situations and what you might do to manually expose your image. It’s a bright sunny day and you have a standard lens on your camera of about 50mm, it gives you the width of view you like. You know you need a shutter speed of at least 60th of a second to hand hold the image without camera shake. To get the best quality image you set your chip sensitivity as low as possible probably 100 iso. Now all you need to do is adjust your aperture until the meter in the camera says you have a correct exposure! If the exposure is out of range of the aperature settings then you have to adjust the iso rating.
So how do I know what ISO to set to start with? General rule of thumb is as follows:
100-200iso for bright sunny days.
400iso for dull days or bright interiors.
800-1600 for indoor lit scenes at night.
3200 and above for night time shots to give you the shortest shutter speed possible.
Obviously it is possible to shoot night time shots on 100iso rated chips but the exposure length even with the aperture right open is going to be too long to hand hold so you will need a tripod.
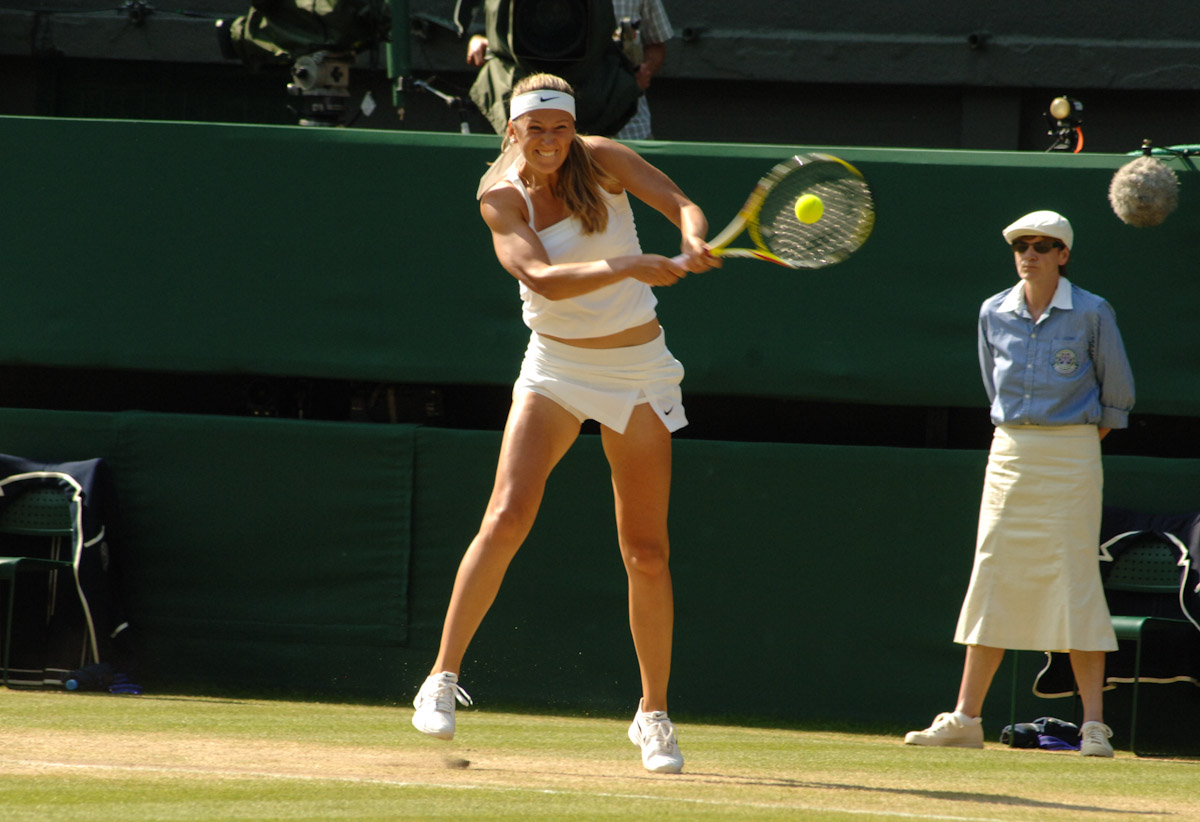
Of course once you understand these basics you might chose to freeze the action of a sports shot using a long lens, say a 400mm or above. You’ll know that to hand hold the shot you will need at least 400th of a second but even that isn’t fast enough to freeze the sports man in action, in the case of a tennis player perhaps the person might be frozen but the ball isn’t. So you might have to go to 100th of a second or faster. Now both the aperture and the chip speed are used to get the exposure required. Open the aperture to it’s widest and it still isn’t correctly exposed on 100iso even though it is a sunny day. So now you start speeding up the chip maybe even as far as 1600 or 3200iso. The resulting picture might look a bit grainy but that is the trade off required to get the sharp action.

Lets take another example, you want to shoot one flower in a bunch and make the rest all go blurred, you need a shallow depth of field so the aperture has to be set as wide open as possible, F2 or F2.8 although you could hand hold easily at 60th of a second on this subject with your 500mm close up lens to get the exposure you have to shut the shutter speed down further, it won’t matter in this case it’s just will eliminate camera shake doubly so.
You are at a horse show in an indoor stadium. The lighting levels are quite good for indoors but you need to use a long lens to get close to the action and a fast shutter speed to freeze the horse jumping. You’d first set the shutter speed needed, perhaps 250th of a second, then open the aperture as wide as possible to let as much light in as possible and lastly turn the iso rating up to get in the right range for the combination of the shutter speed and aperture.
Lastly what about a waterfall that you want to make look soft and flowing? A long exposure of half a second or so will smooth out the water flow and make it look very calm. So the compensation has to be made to reduce the exposure produced by a long shutter speed by shutting down the aperture to a small hole and/or reducing the iso rating – it’s all very logical really once you understand the principles. Once you start using manual you’ll chose just how much depth of field you think the image needs, you’ll choose just how much action you want to freeze and you’ll set the chip sensitivity to make our choice of the other two work.
Understanding and control our of your equipment becomes very satisfying, it produces the results you want and makes your pictures different from everyone else. This is why professional photographers come away from any scenario with better images than Mr and Mrs Happy Snapper.
Brian Russell
Copyright Oct 2014.