I talked in my last blog about the importance of keeping old family photographs even if you don’t know who the characters in them are until such time as you can do some family history research which can shed some light on the subject.
Once you know who some of these people are the importance of the picture increases ten fold and at that point one looks at the picture with more respect and with a view to keeping it safe.
So what can you do to restore or repair old pictures? In years gone by this was solely the realm of the professional photographer or retoucher but digital processes have made the whole process much simpler and anyone with an interest in images can soon pick up a basic understanding and the skills to improve those old pictures.
Firstly, lets understand the difference between restoration and retouching. Retouching is when you replace bits in the picture that aren’t what you want, for example the removal of a crease line in a picture or duplication of one area into another to restore a damaged area. This is the more complex and skilled end of improving an image.
Restoration is taking the original image and improving the overall appearance. Originally restoration was done on the original by hand by skilled artists. But now you can scan your old image and work entirely digitally. Basic restoration includes restoring contrast and adjusting the greyscale of an image (the detail between black and white) to bring back the detail.
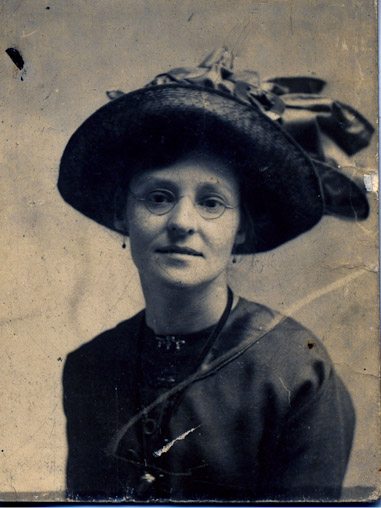
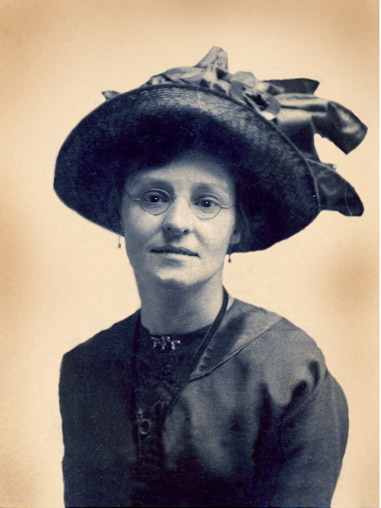
You will be surprised that often faded and poor detailed sepia images can be restored to the full range of a black and white modern image restoring a large amount of detail and definition. Similar things can be done for old coloured prints though achieving a natural colour effect can take a bit of practice.
An ideal program to start this sort of work used by many professionals is Adobe Lightroom. Many scanners come with a free copy of the program in a lite format – a slightly simplified presentation. The basic program has it’s roots in the long history of Adobe Photoshop so it’s underlying engine is one of the best.
The first step is to scan your image. Try to make the file size as big as your computer can easily handle. For example a 10×8 inch print scanned at 300dpi (dots per inch) will give you a fair starting point but if the original is smaller then you need to increase the dpi maybe to 400, 600 or even 1200 dpi. I normally try for a final file size of between 25 and 35mb for the total file size opened in the program used. Bear in mind this is not the same as the file size it will show if saved as a jpeg, which will be much smaller.
Once you have scanned the original picture save it, call it original or something of that nature, then start work on the adjustments to the contrast and greyscale. When you are happy with your initial rebalancing DON’T just press save. Use save as and use a different name – eg restored1. Then as you make further changes always use save as and Restored2 etc. This way you never loose your original and can easily go back to what ever step you want if something goes wrong.
I know some of you will now be saying that their program allows infinite steps backwards but if you have to close the program or you get a power cut you will loose those options. Better to be safe than sorry!
Once you have reached a level of detail in an image you are happy with only then is it worth starting on the retouching in my opinion. If you try and do the retouching before the contrast balances sometimes you can see where imported and copied areas don’t quite match once adjusted.
In a basic introduction article like this it’s difficult to go into detail about the retouching side. Probably the first attempts should be made to try and clean background details, a dirty plain background to a portrait can easily be improved with a duplication brush starting with a small clean area and copying it, keep duplicating until you have a large enough area to start using a larger brush.
The hardest areas to clean up is around eyes and areas of very fine detail on a face. I’ve before now duplicated and replaced arms and legs but details in the face are still the hardest.
If you get to a point where you don’t have the skills to improve an image further, there just isn’t the detail in an image to restore a lost area from, then stop and go back to your saved version previously and keep that as your final restored image ready for printing, it may not be perfect but it will be far better than the original.

When wanting to get interest from the very young in old pictures it has been proved that adding colour actually interests them more. Hand colouring a black and white image can be great fun, it’s not as hard as painting from scratch obviously and achieves a very different feel to an image. I personally prefer to keep an image black and white but that is a personal opinion only.
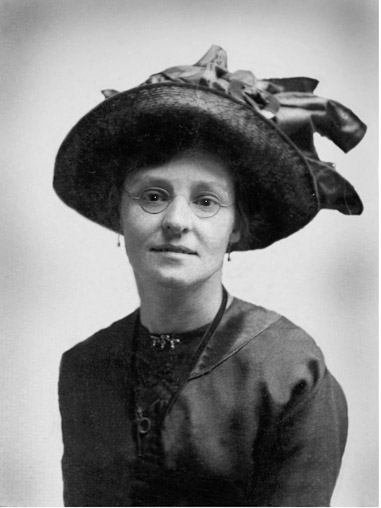

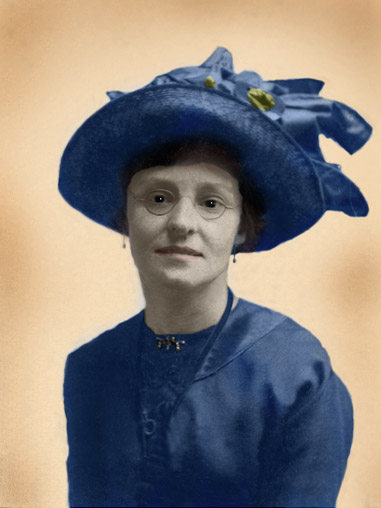
Once you have your finished restored or retouched image don’t keep it to yourself, share it with relatives so that the image will progress down more than one branch of a family tree, you are helping to preserve the past. The examples here show some of the possible directions you can go when restoring an image. Personal choice will dictate whether it stays black and white or moves towards a coloured version.
By Brian Russell
Copyright May 2014